A clean dryer doesn’t just feel nicer—it runs faster, uses less energy, and is far less likely to overheat or fail. Lint is sneaky; it slips past the screen, lodges in the elbows of the vent, cakes around the exterior hood, and quietly strangles airflow. The result? Long cycles, high utility bills, and unnecessary wear on belts, bearings, and heating elements. This guide walks you through a thorough, safe clean-out of your dryer and vent system, plus signs to watch for and when to call in a pro.
Why Dryer & Vent Cleaning Matters

- Shorter cycles, lower costs. Good airflow lets humid air escape quickly, so clothes dry faster and your dryer runs fewer minutes per load.
- Longer appliance life. Motors and heating elements work less hard when vents are clear.
- Fewer breakdowns. Lint buildup is a leading cause of overheating, blown thermostats, and thermal fuses.
- Cleaner home air. A clogged vent can push warm, linty air into your laundry area.
If your dryer has gone from 40-minute cycles to “Why is this still damp?”, the vent is a usual suspect.
Safety First

- Unplug electric dryers. For gas dryers, shut off the gas supply at the valve and avoid disturbing the flexible gas line.
- Let the dryer cool for at least 30 minutes.
- Wear a dust mask and safety glasses. Lint dust becomes airborne quickly.
- Be gentle with foil ducts. Crushed or torn foil flex duct should be replaced with smooth-wall metal ducting for best performance.
Not comfortable sliding the unit out or dealing with gas connections? You can always schedule a pro. Start with Book an appointment.
Tools & Materials Checklist

- Vacuum with crevice tool (a small brush attachment helps)
- Dryer vent brush kit (long, flexible rod with bristle head)
- Soft cloths and a non-abrasive cleaner (for sensors and drum)
- Screwdriver (to remove vent clamps; some need a nut driver)
- Aluminum foil tape (UL-listed) for duct joints—skip common “duct tape”
- Replacement clamp(s) and, if needed, semi-rigid or rigid metal venting
- Flashlight
Quick Anatomy: Where Lint Hides

- Lint screen & housing: Captures most lint—but not all.
- Exhaust path inside the dryer: The short run between the lint trap and the exhaust outlet.
- Transition duct (behind the dryer): Often crushed when the unit is pushed back.
- In-wall or under-floor ducting: Elbows and long runs gather lint.
- Exterior vent hood: Flapper sticks, screens clog, and birds build nests.
Step-by-Step: Deep-Clean for Better Efficiency
1) Power Down and Pull the Dryer Forward

- Unplug (and shut off gas if applicable).
- Gently pull the dryer out to create working space—watch the transition duct and gas line.
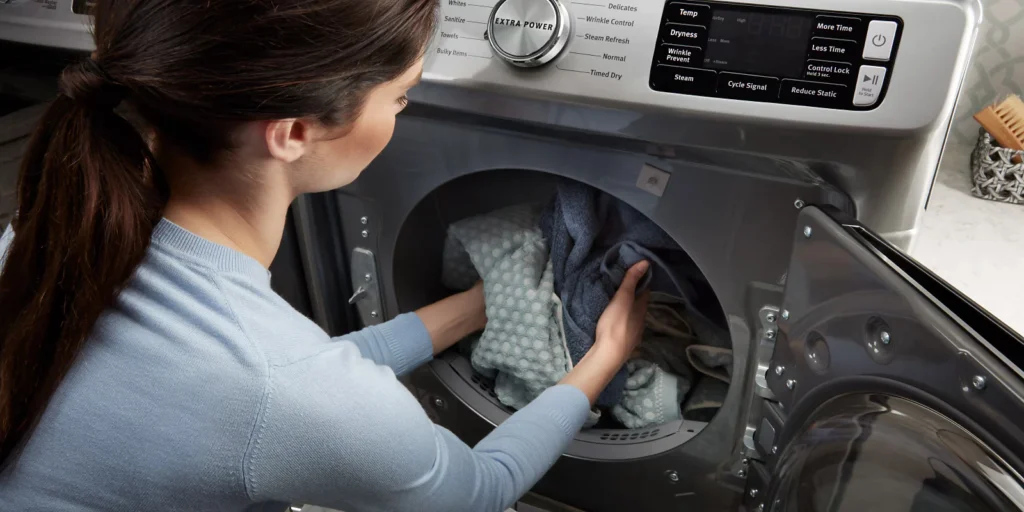
2) Clean the Lint Screen and Housing

- Remove the lint screen and wash it with warm water and a drop of dish soap if fabric softener residue has made it slick. Let it dry completely.
- Insert your vacuum’s crevice tool into the lint screen housing; sweep slowly to capture packed lint.
3) Vacuum Inside Reachable Cavities

- Remove the front lower panel or rear service panel if your model allows (check your manual).
- Vacuum visible lint around the blower wheel inlet and internal air channels without poking delicate wiring or sensors.
4) Wipe the Moisture Sensors

- Inside the drum, find two narrow metal strips (usually below the door).
- Clean with a soft cloth dampened with rubbing alcohol to remove dryer sheet residue.
- This helps the dryer accurately sense dryness—avoiding over-drying and wasted energy.
5) Detach and Clean the Transition Duct

- Loosen the clamp and remove the duct from the dryer.
- If it’s thin, accordion-style foil and badly crumpled, replace it with semi-rigid or rigid metal duct.
- Run the vent brush through the duct or vacuum it from both ends until clear.
6) Brush Out the In-Wall Vent

- Insert the brush rod into the wall duct from the laundry room side and spin while advancing.
- Retrieve, clean the brush head, and repeat until minimal lint appears.
- If the duct run is long, finish from the exterior as well.
7) Clean the Exterior Vent Hood

- From the outside, remove the hood cover if possible.
- Clear lint, check that the flapper opens/closes freely, and remove any screen that traps lint at the exit (many codes discourage screens here for this reason).
- Vacuum and wipe the hood; reattach firmly.
8) Reassemble, Reseat, and Test Airflow

- Reconnect the transition duct using clamps and foil tape on rigid joints (no screws penetrating the duct interior).
- Plug the dryer in (restore gas if applicable).
- Run the dryer on “Air Only” for 60 seconds; outside, you should feel a strong, warm airflow. Weak airflow suggests additional blockage or a crushed duct.
How Often Should You Clean?

- Lint screen: Every load (and a warm, soapy wash monthly if you use dryer sheets).
- Lint housing & transition duct: Every 3–6 months for average households; monthly for large families or heavy laundry routines.
- In-wall duct & exterior hood: Every 6–12 months, or immediately if you notice symptoms below.
Signs Your Dryer & Vent Need Attention

- Loads take longer than they used to (or need two cycles).
- Clothes come out very hot, yet still damp.
- A burning or “hot dust” smell during operation.
- The exterior of the dryer feels unusually warm.
- Lint accumulation around the exterior vent, or the flapper doesn’t open fully.
- The dryer frequently pauses, trips, or throws airflow/sensor error codes.
Common Mistakes to Avoid

- Using plastic or vinyl ducting. These are a fire hazard; use metal only.
- Screws inside the duct. They snag lint; use foil tape and proper clamps instead.
- Long, bendy runs when a shorter path exists. Shorter and straighter is always better.
- Ignoring the moisture sensors. Residue can trick “auto dry” into running longer.
- Pushing the dryer back too far. This crushes the transition duct and throttles airflow.
Special Notes for Gas Dryers

If you smell gas, stop and ventilate immediately, then do not operate the dryer. Gas dryers share the same venting principles, but added care around connections is essential. If any step requires moving or disconnecting the gas line—or if the flame sensor or igniter may be involved—bring in a technician. For safe, warrantied service, consider Professional Appliance Repair.
When to Call a Professional

DIY cleaning covers a lot, but pros are invaluable when:
- The vent run is long, has multiple elbows, or exits the roof.
- You suspect birds’ nests, crushed ductwork, or hidden disconnections inside walls.
- Your dryer still dries slowly after cleaning—pointing to a bad blower wheel, worn belt, failing thermostat, or heating element.
- You prefer a camera inspection or airflow measurement to verify performance.
If repair—not just cleaning—is needed (e.g., no heat, error codes, squealing bearings), head to Dryer repair for model-specific diagnostics and service options. To plan a visit on your schedule, you can book an appointment. Have questions first? Contact us—a specialist can help you choose between a cleaning, a tune-up, or a repair.
Quick Maintenance Routine (15 Minutes, Once a Month)

- Empty and inspect the lint screen; wash it if it looks shiny.
- Vacuum the lint housing with a crevice tool.
- Check behind the dryer to confirm the transition duct isn’t crushed.
- Step outside: flick the hood flap and brush away visible lint.
- Wipe the moisture sensors inside the drum with alcohol.
A tiny routine like this keeps your annual deep-clean short and your energy bills lighter.
Final Thoughts
Dryer efficiency is mostly about airflow. If you control lint and keep ducts clear, you’ll get faster cycles, gentler treatment of fabrics, and fewer surprise breakdowns. Do the routine clean-ups monthly, deep-clean at least once a year, and don’t hesitate to call for help when the vent route is complex or the machine shows heat-cycle issues. For friendly, local service and guaranteed work, start with Professional Appliance Repair or go straight to Book an appointment. If you need answers tailored to your model, contact us anytime.